Anyone who has administered a little SCCM in their time, would be be familiar with the tool CMTrace or SMSTrace. CMTrace is a tool that comes with System Center Configuration Manager. It allows you to view the myriad of logs files that SCCM generates in a consistent and easy to read format. Being used to the log format that CMTrace generates, I thought it would be a great idea to use that format for logging Powershell script actions and errors.
I hunted around the web and found a few versions of a log function using CMTRace. The best implementation that I found was from Russ Slaten at the System Center Blog site. It works really well but I wanted to add some different functionality.
CMTrace.exe is part of the System Center 2012 R2 Configuration Manager Toolkit, which I believe anyone can download. If you have System Center Configuration Manager installed in your environment, you can also grab it from the \\”SiteServer”\Program Files\Microsoft Configuration Manager\tools\cmtrace.exe.
There are a few different use cases for when logging is handy: -
- Running Powershell scripts as Scheduled Tasks.
- Auditing automation centrally in a team environment.
- The output of a log could be used as part of change management processes.
- Debugging locally and remotely
I’ll start off by posting the script. Below I’ll go into some information that might help in using the script.
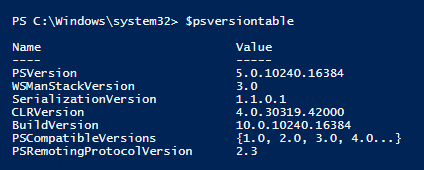
**NOTE: This has only been tested on Powershell v5.0. The information stream is a new feature of Powershell v5.0.**
Here is the script: -
|
1 2 3 4 5 6 7 8 9 10 11 12 13 14 15 16 17 18 19 20 21 22 23 24 25 26 27 28 29 30 31 32 33 34 35 36 37 38 39 40 41 42 43 44 45 46 47 48 49 50 51 52 53 54 55 56 57 58 59 60 61 62 63 64 65 66 67 68 69 70 71 72 73 74 75 76 77 78 79 80 81 82 83 84 85 86 87 88 89 90 91 92 93 94 95 96 97 98 99 100 101 102 103 104 105 106 107 108 109 110 111 112 113 114 115 116 117 118 119 120 121 122 123 124 125 126 127 128 129 130 131 132 133 134 135 136 137 138 139 140 141 142 143 144 145 146 147 148 149 150 151 152 153 154 155 156 157 158 159 160 161 162 163 164 165 166 167 168 169 170 171 172 173 174 175 176 177 178 179 180 181 182 183 184 185 186 187 188 189 190 191 192 193 194 195 196 197 198 199 200 201 202 203 204 205 206 207 208 209 210 211 212 213 214 215 216 217 218 219 220 221 222 223 224 225 226 227 228 229 230 231 232 233 234 235 236 237 238 239 240 241 242 243 244 245 246 247 248 249 250 251 252 253 254 255 256 257 258 259 260 261 262 263 264 265 266 267 268 269 270 271 272 273 274 275 276 277 278 279 280 281 282 283 284 285 286 287 288 289 290 291 292 293 294 295 296 297 298 299 300 301 302 303 304 305 306 307 308 309 310 311 312 313 314 315 316 317 318 319 320 321 322 323 324 325 326 327 328 329 330 331 332 333 334 335 336 337 338 339 340 341 342 343 344 345 346 347 348 349 350 351 352 353 354 355 356 357 358 359 360 361 362 363 364 365 366 367 368 369 |
#Requires -version 5.0 Function Write-CMTraceLog{ ########################################################################################################## <# .SYNOPSIS Write to a log file in a format that takes advantage of the CMTrace.exe log viewer that comes with SCCM. .DESCRIPTION Output strings to a log file that is formatted for use with CMTRace.exe and also writes back to the host. The severity of the logged line can be set as: 2-Error 3-Warning 4-Verbose 5-Debug 6-Information Warnings will be highlighted in yellow. Errors are highlighted in red. The tools to view the log: SMS Trace - http://www.microsoft.com/en-us/download/details.aspx?id=18153 CM Trace - https://www.microsoft.com/en-us/download/details.aspx?id=50012 or the Installation directory on Configuration Manager 2012 Site Server - <Install Directory>\tools\ .EXAMPLE Try{ Get-Process -Name DoesnotExist -ea stop } Catch{ Write-CMTraceLog -Logfile "C:\output\logfile.log -Message $Error[0] -Type Error } This will write a line to the logfile.log file in c:\output\logfile.log. It will state the errordetails in the log file and highlight the line in Red. It will also write back to the host in a friendlier red on black message than the normal error record. .EXAMPLE $VerbosePreference = Continue Write-CMTraceLog -Message "This is a verbose message." -Type Verbose This example will write a verbose entry into the log file and also write back to the host. The Write-CMTraceLog will obey the preference variables. .EXAMPLE Write-CMTraceLog -Message "This is an informational message" -Type Information -WritebacktoHost:$false This example will write the informational message to the log but not back to the host. .EXAMPLE Function Test{ [cmdletbinding()] Param() Write-CMTraceLog -Message "This is a verbose message" -Type Verbose } Test -Verbose This example shows how to use write-cmtracelog inside a function and then call the function with the -verbose switch. The write-cmtracelog function will then print the verbose message. .NOTES ########## Change Log ########## v1.5 - 12-03-2015 - Found bug with Error writing back to host twice. Fixed. ########## v1.4 - 12-03-2015 - Found bug with Warning writebackto host duplicating warning error message. Fixed. ########## v1.3 - 23-12-2015 - Commented out line 224 and 249 as it was causing a duplicaton of the message. ########## v1.2 - Fixed inheritance of preference variables from child scopes finally!! Changed from using using get-variable -scope 1 (which doesn't work when a script modules calls a function: See this Microsoft Connect bug https://connect.microsoft.com/PowerShell/feedback/details/1606119.) Anyway now now i use the $PSCmdlet.GetVariableValue('VerbosePreference') command and it works. ########## v1.1 - Found a bug with the get-variable scope. Need to refer to 2 parent scopes for the writebacktohost to work. - Changed all Get-Variable commands to use Scope 2, instead of Scope 1. ########## v1.0 - Script Created #> ########################################################################################################## #Define and validate parameters [CmdletBinding()] Param( #Path to the log file [parameter(Mandatory=$False)] [String]$Logfile = "$Env:Temp\powershell-cmtrace.log", #The information to log [parameter(Mandatory=$True)] $Message, #The severity (Error, Warning, Verbose, Debug, Information) [parameter(Mandatory=$True)] [ValidateSet('Warning','Error','Verbose','Debug', 'Information')] [String]$Type, #Write back to the console or just to the log file. By default it will write back to the host. [parameter(Mandatory=$False)] [switch]$WriteBackToHost = $True )#Param #Get the info about the calling script, function etc $callinginfo = (Get-PSCallStack)[1] #Set Source Information $Source = (Get-PSCallStack)[1].Location #Set Component Information $Component = (Get-Process -Id $PID).ProcessName #Set PID Information $ProcessID = $PID #Obtain UTC offset $DateTime = New-Object -ComObject WbemScripting.SWbemDateTime $DateTime.SetVarDate($(Get-Date)) $UtcValue = $DateTime.Value $UtcOffset = $UtcValue.Substring(21, $UtcValue.Length - 21) #Set the order switch($Type){ 'Warning' {$Severity = 2}#Warning 'Error' {$Severity = 3}#Error 'Verbose' {$Severity = 4}#Verbose 'Debug' {$Severity = 5}#Debug 'Information' {$Severity = 6}#Information }#Switch #Switch statement to write out to the log and/or back to the host. switch ($severity){ 2{ #Warning #Write the log entry in the CMTrace Format. $logline = ` "<![LOG[$($($Type.ToUpper()) + ": " + $message)]LOG]!>" +` "<time=`"$(Get-Date -Format HH:mm:ss.fff)$($UtcOffset)`" " +` "date=`"$(Get-Date -Format M-d-yyyy)`" " +` "component=`"$Component`" " +` "context=`"$([System.Security.Principal.WindowsIdentity]::GetCurrent().Name)`" " +` "type=`"$Severity`" " +` "thread=`"$ProcessID`" " +` "file=`"$Source`">"; $logline | Out-File -Append -Encoding utf8 -FilePath $Logfile; #Write back to the host if $Writebacktohost is true. if(($WriteBackToHost) -and ($Type -eq 'Warning')){ Switch($PSCmdlet.GetVariableValue('WarningPreference')){ 'Continue' {$WarningPreference = 'Continue';Write-Warning -Message "$Message";$WarningPreference=''} 'Stop' {$WarningPreference = 'Stop';Write-Warning -Message "$Message";$WarningPreference=''} 'Inquire' {$WarningPreference ='Inquire';Write-Warning -Message "$Message";$WarningPreference=''} 'SilentlyContinue' {} } } }#Warning 3{ #Error #This if statement is to catch the two different types of errors that may come through. A normal terminating exception will have all the information that is needed, if it's a user generated error by using Write-Error, #then the else statment will setup all the information we would like to log. if($Message.exception.Message){ if(($WriteBackToHost)-and($Type -eq 'Error')){ #Write the log entry in the CMTrace Format. $logline = ` "<![LOG[$($($Type.ToUpper()) + ": " + "$([String]$Message.exception.message)`r`r" + ` "`nCommand: $($Message.InvocationInfo.MyCommand)" + ` "`nScriptName: $($Message.InvocationInfo.Scriptname)" + ` "`nLine Number: $($Message.InvocationInfo.ScriptLineNumber)" + ` "`nColumn Number: $($Message.InvocationInfo.OffsetInLine)" + ` "`nLine: $($Message.InvocationInfo.Line)")]LOG]!>" +` "<time=`"$(Get-Date -Format HH:mm:ss.fff)$($UtcOffset)`" " +` "date=`"$(Get-Date -Format M-d-yyyy)`" " +` "component=`"$Component`" " +` "context=`"$([System.Security.Principal.WindowsIdentity]::GetCurrent().Name)`" " +` "type=`"$Severity`" " +` "thread=`"$ProcessID`" " +` "file=`"$Source`">" $logline | Out-File -Append -Encoding utf8 -FilePath $Logfile; #Write back to Host Switch($PSCmdlet.GetVariableValue('ErrorActionPreference')){ 'Stop'{$ErrorActionPreference = 'Stop';$Host.Ui.WriteErrorLine("ERROR: $([String]$Message.Exception.Message)");Write-Error $Message -ErrorAction 'Stop';$ErrorActionPreference=''} 'Inquire'{$ErrorActionPreference = 'Inquire';$Host.Ui.WriteErrorLine("ERROR: $([String]$Message.Exception.Message)");Write-Error $Message -ErrorAction 'Inquire';$ErrorActionPreference=''} 'Continue'{$ErrorActionPreference = 'Continue';$Host.Ui.WriteErrorLine("ERROR: $([String]$Message.Exception.Message)");$ErrorActionPreference=''} 'Suspend'{$ErrorActionPreference = 'Suspend';$Host.Ui.WriteErrorLine("ERROR: $([String]$Message.Exception.Message)");Write-Error $Message -ErrorAction 'Suspend';$ErrorActionPreference=''} 'SilentlyContinue'{} } } else{ #Write the log entry in the CMTrace Format. $logline = ` "<![LOG[$($($Type.ToUpper()) + ": " + "$([String]$Message.exception.message)`r`r" + ` "`nCommand: $($Message.InvocationInfo.MyCommand)" + ` "`nScriptName: $($Message.InvocationInfo.Scriptname)" + ` "`nLine Number: $($Message.InvocationInfo.ScriptLineNumber)" + ` "`nColumn Number: $($Message.InvocationInfo.OffsetInLine)" + ` "`nLine: $($Message.InvocationInfo.Line)")]LOG]!>" +` "<time=`"$(Get-Date -Format HH:mm:ss.fff)$($UtcOffset)`" " +` "date=`"$(Get-Date -Format M-d-yyyy)`" " +` "component=`"$Component`" " +` "context=`"$([System.Security.Principal.WindowsIdentity]::GetCurrent().Name)`" " +` "type=`"$Severity`" " +` "thread=`"$ProcessID`" " +` "file=`"$Source`">" $logline | Out-File -Append -Encoding utf8 -FilePath $Logfile; } } else{ if(($WriteBackToHost)-and($type -eq 'Error')){ [System.Exception]$Exception = $Message [String]$ErrorID = 'Custom Error' [System.Management.Automation.ErrorCategory]$ErrorCategory = [Management.Automation.ErrorCategory]::WriteError #[System.Object]$Message $ErrorRecord = New-Object Management.automation.errorrecord ($Exception,$ErrorID,$ErrorCategory,$Message) $Message = $ErrorRecord #Write the log entry $logline = ` "<![LOG[$($($Type.ToUpper()) + ": " + "$([String]$Message.exception.message)`r`r" + ` "`nFunction: $($Callinginfo.FunctionName)" + ` "`nScriptName: $($Callinginfo.Scriptname)" + ` "`nLine Number: $($Callinginfo.ScriptLineNumber)" + ` "`nColumn Number: $($callinginfo.Position.StartColumnNumber)" + ` "`nLine: $($Callinginfo.Position.StartScriptPosition.Line)")]LOG]!>" +` "<time=`"$(Get-Date -Format HH:mm:ss.fff)$($UtcOffset)`" " +` "date=`"$(Get-Date -Format M-d-yyyy)`" " +` "component=`"$Component`" " +` "context=`"$([System.Security.Principal.WindowsIdentity]::GetCurrent().Name)`" " +` "type=`"$Severity`" " +` "thread=`"$ProcessID`" " +` "file=`"$Source`">" $logline | Out-File -Append -Encoding utf8 -FilePath $Logfile; #Write back to Host. Switch($PSCmdlet.GetVariableValue('ErrorActionPreference')){ 'Stop'{$ErrorActionPreference = 'Stop';$Host.Ui.WriteErrorLine("ERROR: $([String]$Message.Exception.Message)");Write-Error $Message -ErrorAction 'Stop';$ErrorActionPreference=''} 'Inquire'{$ErrorActionPreference = 'Inquire';$Host.Ui.WriteErrorLine("ERROR: $([String]$Message.Exception.Message)");Write-Error $Message -ErrorAction 'Inquire';$ErrorActionPreference=''} 'Continue'{$ErrorActionPreference = 'Continue';$Host.Ui.WriteErrorLine("ERROR: $([String]$Message.Exception.Message)");Write-Error $Message 2>&1 > $null;$ErrorActionPreference=''} 'Suspend'{$ErrorActionPreference = 'Suspend';$Host.Ui.WriteErrorLine("ERROR: $([String]$Message.Exception.Message)");Write-Error $Message -ErrorAction 'Suspend';$ErrorActionPreference=''} 'SilentlyContinue'{} } } else{ #Write the Log Entry [System.Exception]$Exception = $Message [String]$ErrorID = 'Custom Error' [System.Management.Automation.ErrorCategory]$ErrorCategory = [Management.Automation.ErrorCategory]::WriteError #[System.Object]$Message $ErrorRecord = New-Object Management.automation.errorrecord ($Exception,$ErrorID,$ErrorCategory,$Message) $Message = $ErrorRecord #Write the log entry $logline = ` "<![LOG[$($($Type.ToUpper())+ ": " + "$([String]$Message.exception.message)`r`r" + ` "`nFunction: $($Callinginfo.FunctionName)" + ` "`nScriptName: $($Callinginfo.Scriptname)" + ` "`nLine Number: $($Callinginfo.ScriptLineNumber)" + ` "`nColumn Number: $($Callinginfo.Position.StartColumnNumber)" + ` "`nLine: $($Callinginfo.Position.StartScriptPosition.Line)")]LOG]!>" +` "<time=`"$(Get-Date -Format HH:mm:ss.fff)$($UtcOffset)`" " +` "date=`"$(Get-Date -Format M-d-yyyy)`" " +` "component=`"$Component`" " +` "context=`"$([System.Security.Principal.WindowsIdentity]::GetCurrent().Name)`" " +` "type=`"$Severity`" " +` "thread=`"$ProcessID`" " +` "file=`"$Source`">" $logline | Out-File -Append -Encoding utf8 -FilePath $Logfile; } } }#Error 4{ #Verbose #Write the Log Entry $logline = ` "<![LOG[$($($Type.ToUpper()) + ": " + $message)]LOG]!>" +` "<time=`"$(Get-Date -Format HH:mm:ss.fff)$($UtcOffset)`" " +` "date=`"$(Get-Date -Format M-d-yyyy)`" " +` "component=`"$Component`" " +` "context=`"$([System.Security.Principal.WindowsIdentity]::GetCurrent().Name)`" " +` "type=`"$severity`" " +` "thread=`"$processid`" " +` "file=`"$source`">"; $logline | Out-File -Append -Encoding utf8 -FilePath $Logfile; #Write Back to Host if(($WriteBackToHost) -and ($Type -eq 'Verbose')){ Switch ($PSCmdlet.GetVariableValue('VerbosePreference')) { 'Continue' {$VerbosePreference = 'Continue'; Write-Verbose -Message "$Message";$VerbosePreference = ''} 'Inquire' {$VerbosePreference = 'Inquire'; Write-Verbose -Message "$Message";$VerbosePreference = ''} 'Stop' {$VerbosePreference = 'Stop'; Write-Verbose -Message "$Message";$VerbosePreference = ''} } } }#Verbose 5{ #Debug #Write the Log Entry $logline = ` "<![LOG[$($($Type.ToUpper()) + ": " + $message)]LOG]!>" +` "<time=`"$(Get-Date -Format HH:mm:ss.fff)$($UtcOffset)`" " +` "date=`"$(Get-Date -Format M-d-yyyy)`" " +` "component=`"$Component`" " +` "context=`"$([System.Security.Principal.WindowsIdentity]::GetCurrent().Name)`" " +` "type=`"$severity`" " +` "thread=`"$processid`" " +` "file=`"$source`">"; $logline | Out-File -Append -Encoding utf8 -FilePath $Logfile; #Write Back to the Host. if(($WriteBackToHost) -and ($Type -eq 'Debug')){ Switch ($PSCmdlet.GetVariableValue('DebugPreference')){ 'Continue' {$DebugPreference = 'Continue'; Write-Debug -Message "$Message";$DebugPreference = ''} 'Inquire' {$DebugPreference = 'Inquire'; Write-Debug -Message "$Message";$DebugPreference = ''} 'Stop' {$DebugPreference = 'Stop'; Write-Debug -Message "$Message";$DebugPreference = ''} } } }#Debug 6{ #Information #Write entry to the logfile. $logline = ` "<![LOG[$($($Type.ToUpper()) + ": " + $message)]LOG]!>" +` "<time=`"$(Get-Date -Format HH:mm:ss.fff)$($UtcOffset)`" " +` "date=`"$(Get-Date -Format M-d-yyyy)`" " +` "component=`"$Component`" " +` "context=`"$([System.Security.Principal.WindowsIdentity]::GetCurrent().Name)`" " +` "type=`"$severity`" " +` "thread=`"$processid`" " +` "file=`"$source`">"; $logline | Out-File -Append -Encoding utf8 -FilePath $Logfile; #Write back to the host. if(($WriteBackToHost) -and ($Type -eq 'Information')){ Switch ($PSCmdlet.GetVariableValue('InformationPreference')){ 'Continue' {$InformationPreference = 'Continue'; Write-Information -Message "INFORMATION: $Message";$InformationPreference = ''} 'Inquire' {$InformationPreference = 'Inquire'; Write-Information -Message "INFORMATION: $Message";$InformationPreference = ''} 'Stop' {$InformationPreference = 'Stop'; Write-Information -Message "INFORMATION: $Message";$InformationPreference = ''} 'Suspend' {$InformationPreference = 'Suspend';Write-Information -Message "INFORMATION: $Message";$InformationPreference = ''} } } }#Information }#Switch }#Function v1.5 - 12-03-2016 |
I’ve included a help file inline to help with calling the function.
Where does the log file get created?
The function by default will log to $Env:temp\powershell-cmtrace.log. You can however pass a file location to the function if you would like to the log file in a different location.
What does the output look like on the host?
Here is an example.
Why does Error only log one line back to the host, where is all the ErrorRecord informaiton?
I wanted to write back to the host in a consistent fashion. The error record is still there I’m just not passing it back to the host. The full error record gets put in the log file and you can view that information by clicking on the Error entry and looking at the window down the bottom of CMTrace. Also, you can still access the error information in the host by using the $Error variable. If it were the last error you would access it by using the first index of the $Error variable. eg. $Error[0].
What does the output to the log file look like?
It looks like this. Notice the Error information is in the box down the bottom.
I don’t want to see the output on the host, I just want it to log in the CMTrace format.
There is a parameter switch called WriteBackToHost. By default it’s set to True, but if you don’t want to see the output then set this to false.
How do I call this function?
To call this function, either dot source it, run it from ISE and then call it, put it in your profile or pop it in a module and Bob is your uncle.
Gimme some examples of how to use the Write-CMTracelog function.
Here are some examples of how you would use this advanced function that are in the help section of the function.
Examples:
The below example shows how to output a verbose message.
|
1 |
Write-CMTraceLog -Message 'This is a verbose message' -Type Verbose |
This example shows how to use the Preference variables with the Write-CMTracelog function. It should obey any preference variables that are set in the same scope from where the function has been called.
|
1 2 |
$VerbosePreference = Continue Write-CMTraceLog -Message "This is a verbose message." -Type Verbose |
This example shows how to use the function with a terminating error by using the $Error variable in the message parameter.
|
1 2 3 4 5 6 |
Try{ Get-Process -Name DoesnotExist -ea stop } Catch{ Write-CMTraceLog -Logfile "C:\output\logfile.log -Message $Error[0] -Type Error } |
Hope this function helps you out. Feel free to use and modify to suit your needs.
Sources:
http://blogs.msdn.com/b/rslaten/archive/2014/07/28/logging-in-cmtrace-format-from-powershell.aspx
https://www.microsoft.com/en-us/download/details.aspx?id=50012
http://blogs.technet.com/b/heyscriptingguy/archive/2015/07/04/weekend-scripter-welcome-to-the-powershell-information-stream.aspx


 Follow