


So you’d like to setup an Intranet SSL Certificate for pfSense, Let’s Encrypt & CloudFlare. You have pfSense running on your home network. You got all the great goodies to play with but every time you log in you get that screen come up that says your connection is not secure. This must not stand, I want all things to be secure! SSL all the things! Follow this little guide, and you too can have Let’s Encrypt create you an SSL certificate, automagically, for free-ish…, have it automatically validate via the DNS-01 challenge method and have SSL Certificate automagically renew. ZOMGWTF, yes please!
Why do this? After all, this is your internal network. Well, for me, it was just to learn more about Let’s Encrypt and also because it’s free and why not. Through playing with this I’ve learnt a little about DNS, about AWS Route53, about CloudFlare and most importantly for me, about SSL Certificates and Let’s Encrypt.
Few caveats.
- I have a static IP for my router.
- I have my own Top Level Domain name. For the DNS-01 challenge to work, you need a domain name because you need to prove that you own that domain name via a txt DNS record.
- I’ve used CloudFlare for my DNS service. They are free, they seem good. I tried AWS Route53 but I couldn’t get the DNS-01 challenge working. Pebkac probably but CloudFlare worked so I’ll stay with that.
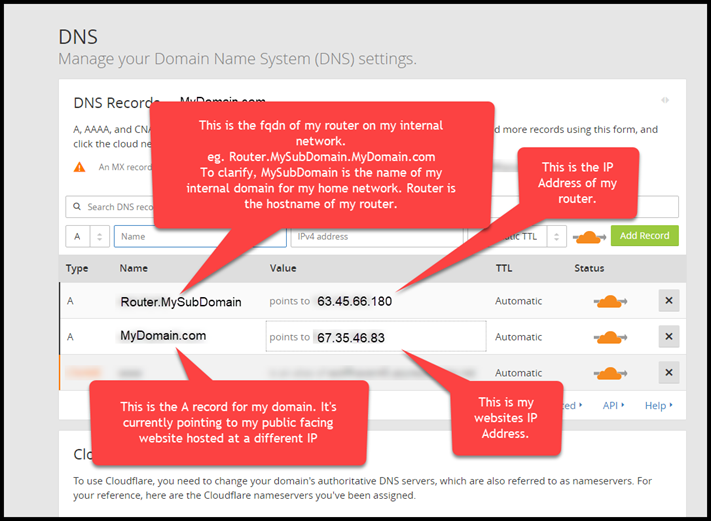
So for starters, I created a CloudFlare account (for free!). I then changed the Nameservers I was using for my domain over to CloudFlare’s Nameservers (this took around 24 hours to validate). I then setup an A record for my router.
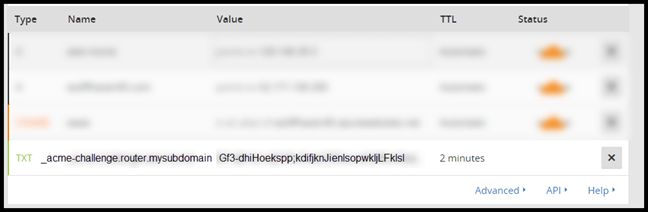
I can’t get to my router externally. The reason I do this is to allow the DNS challenge that the Acme Service will setup to work it’s magic. I’ll break this down how I setup my DNS in the screenshot below.
Note: - I’ve substituted real hostnames and IP Addresses for the tutorial.
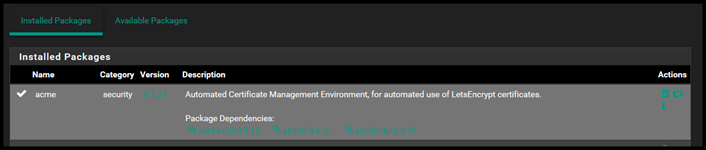
Okay, now that DNS is setup. Let’s turn our attention to Pfsense. Firstly, if you don’t have the Acme Package installed, you’re going to want to install that.
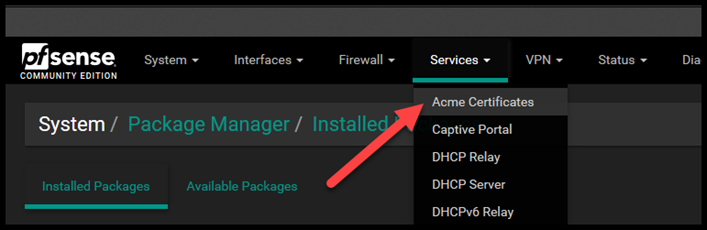
Once that is installed, it’s time to setup the Account Key. Navigate to Acme Certificates located underneath the Services drop down list.
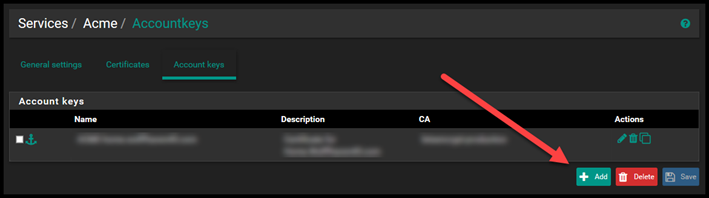
Select the Account Keys tab and then click on Add.
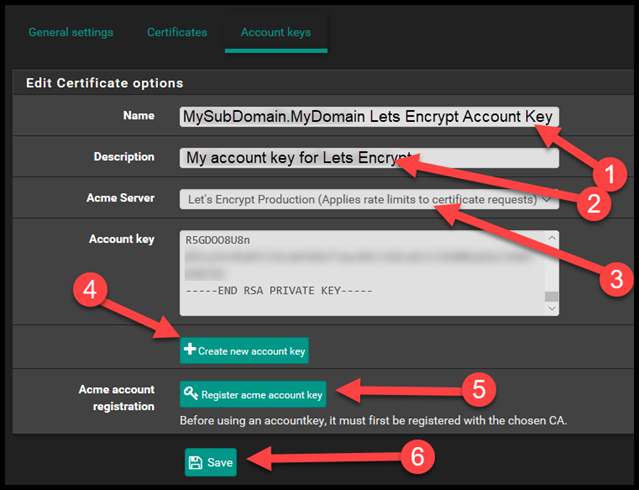
Let me break down this next Screenshot.
- Enter the name of the account key.
- Enter the description of the account key
- Select the Acme Server, you’ll want Production unless it’s just a test.
- Click Create new Account Key.
- Then click Register Acme Account Key
- Then select Save.
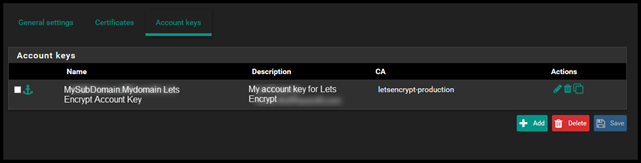
When you go back to the Account keys page you should see your Account Key details.
Now let’s setup the certificate.
- Select the Certificates tab.
- Select Add.

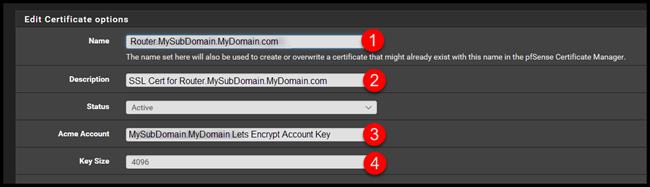
For the first section.
- Enter the name of the certificate.
- Enter the Description of the certificate
- Select the Account that you setup from the drop down.
- Set the key size to 4096 (or leave at 2048 it’s whatever you like….)
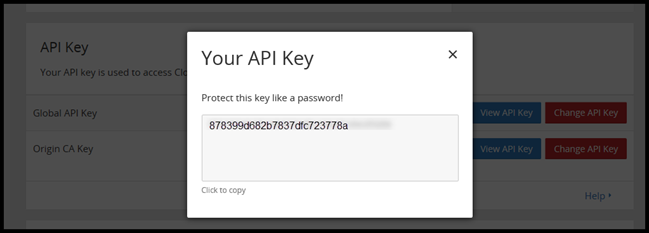
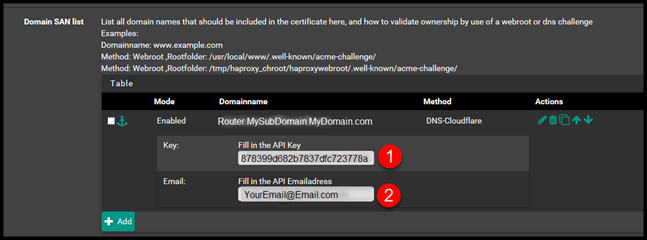
Grab your API Key from CloudFlare. Navigate to Overview > Domain Summary > Get your API Key. Then Select View API Key.
Then, go back to pfSense select Add. Then fill out the Domain Name and then select DNS-Cloudlfare for the method.
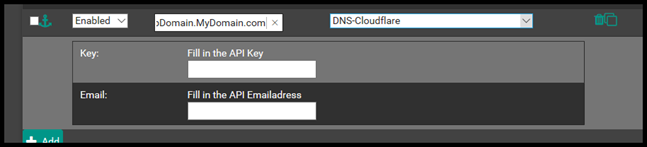
Then enter the API and API Email address from CloudFlare.
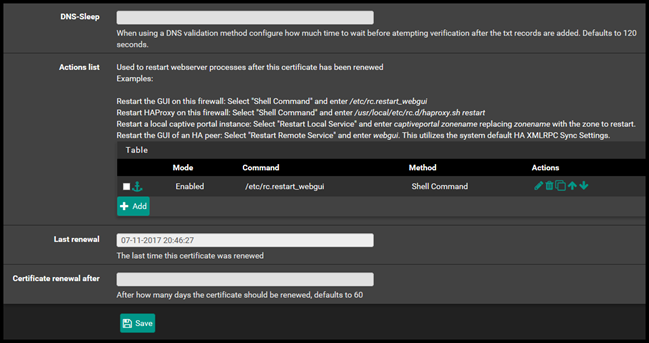
Then for the last section Add the Shell command /etc.rc.restart_webgui
This will restart the Webconfigurator GUI after the certificate has been renewed. Then click Save.
Now go back to the certificates tab and then select Issue / Renew. This will attempt to create the certificate. This will take 2 minutes.
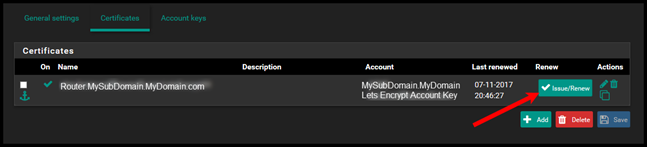
If you check out your DNS entries on CloudFlare while you wait you can see the TXT record that gets created to validate the DNS-01 challenge.
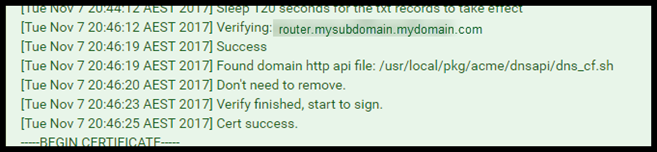
Will take 2 minutes for script to run but eventually you should see the results. SUCCESS!
Now if you navigate to System > Cert. Manager
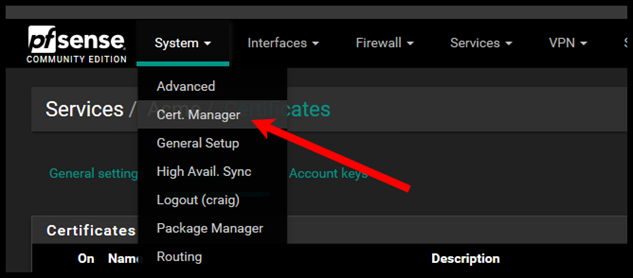
Under the CAs tab, you should see the Acmecert CA.

Under the Certificates tab you should see the Acme Certificate.

Under the Certificate Revocation tab you should see the Acmecert revocation list.

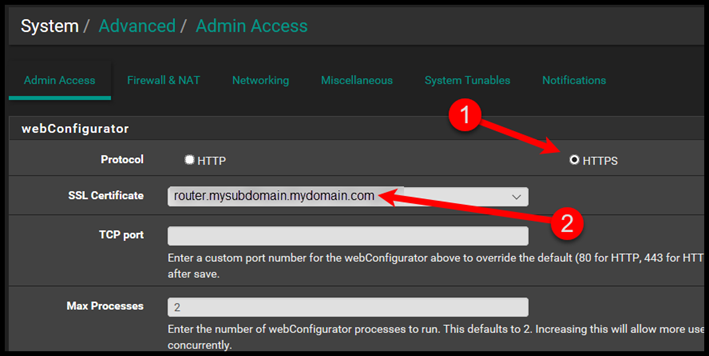
Once you’ve finished validating, lets actually assign the SSL Certificate to the Web Configurator pfSense Website.
Go to System > Advanced > Admin Access and select the SSL Certificate. Select HTTPS and then select the SSL Certificate from the drop down menu.
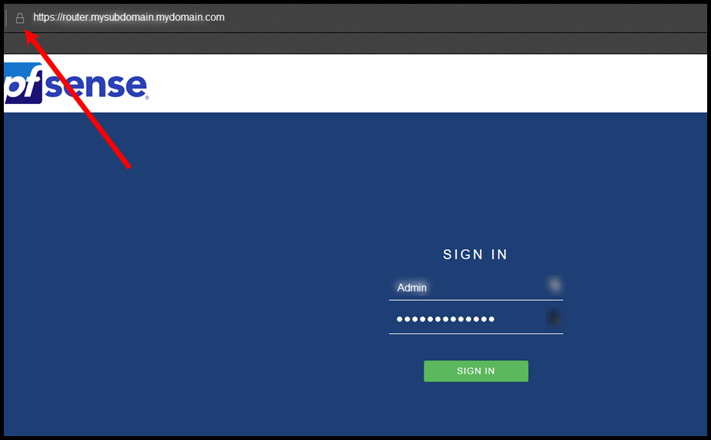
This is what would happen if I try to go to https://my.router.mydomain.com before applying the certificate.
Just a note here: make sure you have an A record on your internal network that resolves router.mysubdomain.mydomain.com.

This is what it looks like after…. Padlock…. SUCCESS!
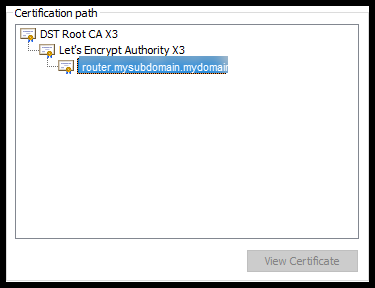
When your web browser requests the SSL certificate it is served up. The root CA for the Lets Encrypt SSL Certificate is DST Root CA X3, which is trusted in all of the browsers that I tried.
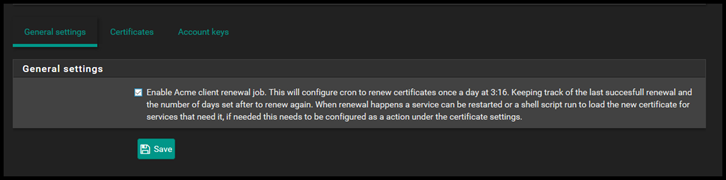
Now one last thing. These certificates only last for 3 months. However, you can configure automatic renewal. Go back and tick the enable acme client renewal job under General Settings.
That should be it, now any website you’re running on your home network you can generate an SSL certificate for using the same process. For Free.
 Follow