SCCM 2012 R2 – MDT 2013 UEFI OS Deployment Error

I recently upgraded to SCCM 2012 R2 and also upgraded to MDT 2013 to take full advantage of its OS deployment goodies. Everything has been going well until I decided I’d like to deploy an OS to a 2nd Generation Hyper-V Virtual Machine. I started getting all sorts of different errors. It really started driving me insane. A lot of four letter words were used. For that I am sorry. Good news is, I got it working in the end.

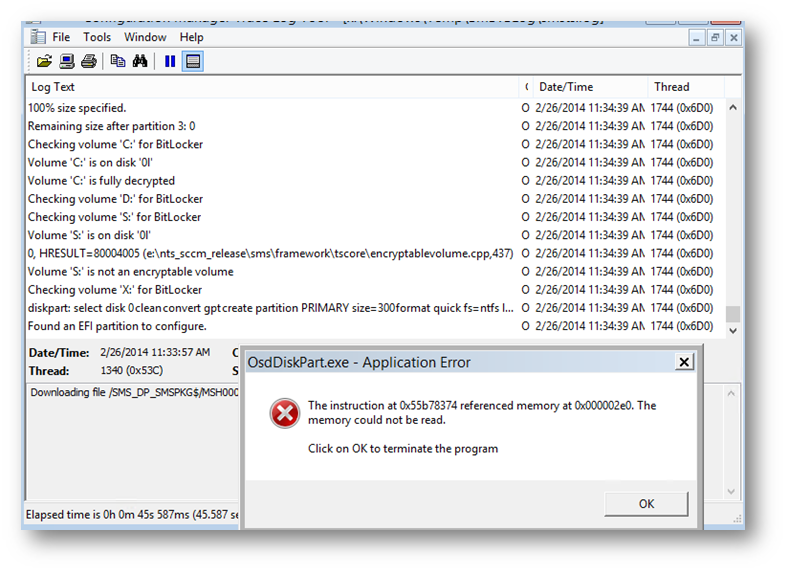
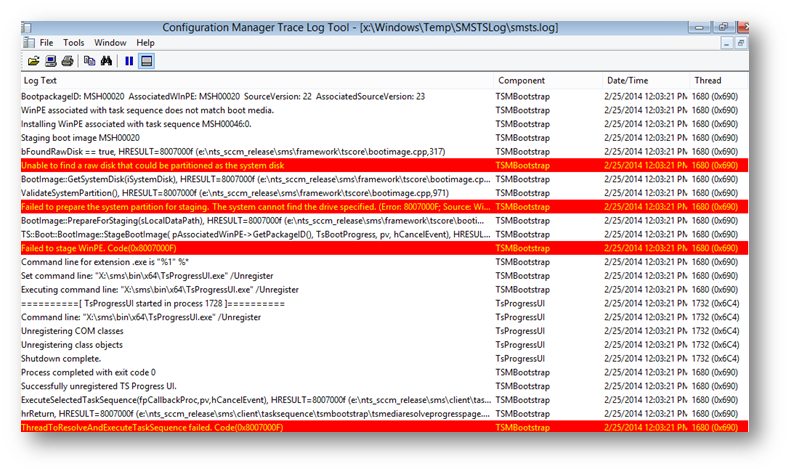
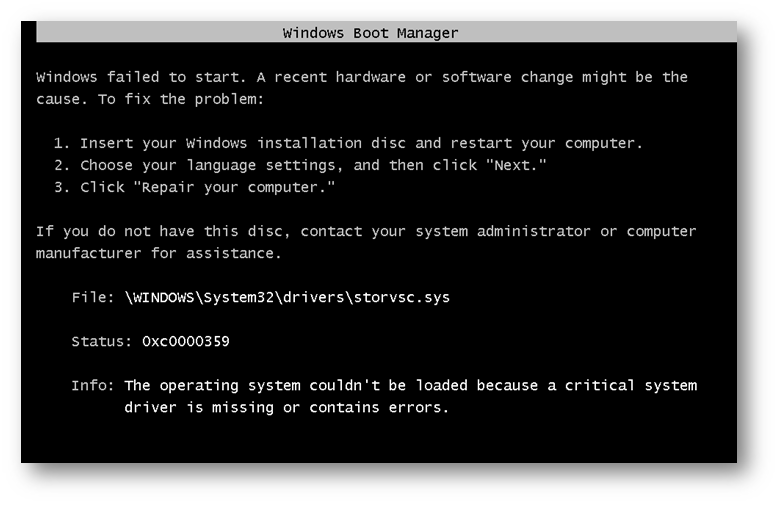
Here are some of the errors that I was receiving. Sometimes it would error before it pre staged the WINPE image, sometimes after. Sometimes after a reboot.

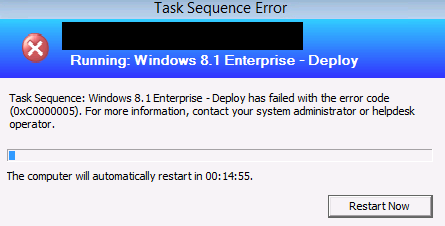
I received a (0xC00000005) error.


A generic memory error.


An “Unable to find a raw disk that could be partitioned as the system disk” error that resulted in a (0x8007000F) error.


And the weirdest one I got, was after the partitions and disk had been setup and SCCM rebooted, it came up with a 0xc0000359 error saying the storvsc.sys was missing.


By this time I’d be round and round and round in circles. It’s then I found a blog post that showed me to change the Partition Variable for the OSDisk from OSDTemporaryDrive to OSDisk. This is apparently set by default to OSDTemporaryDrive in MDT 2013. Seems like a bit of a fail to me L Could I please have a day and half of my life back please Microsoft. That is all.

In the task sequence, look in the Initialization folder for the 4 different format and partition steps.

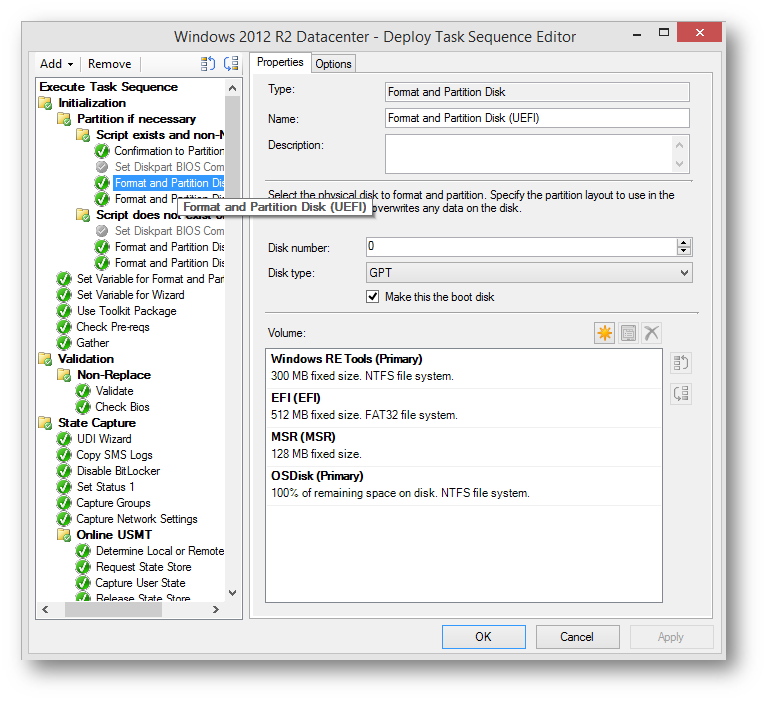
If you look at the OSDisk partition, you’ll find that its variable is set to OSDTemporary Drive.


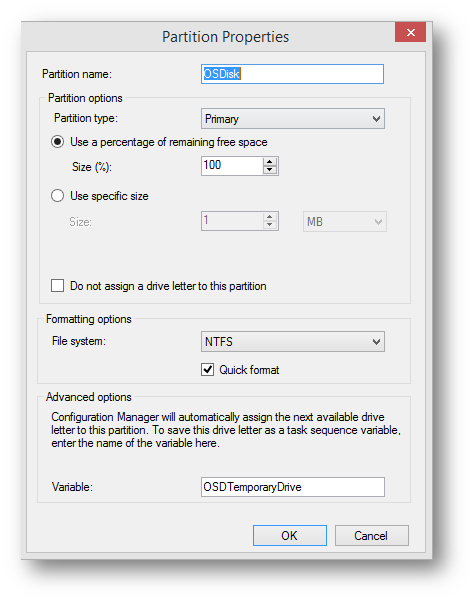
Change this to OSDisk.

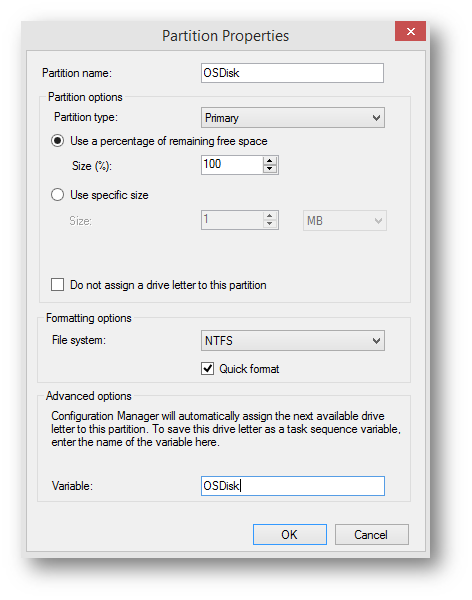
That’s all you need to do.


Upload Word Document or HTML to SharePoint Wiki Workaround

Copying a word document or HTML to a SharePoint Wiki that contains articles can be a long manual process in SharePoint 2010. I’ve tried many different techniques and looked at many different articles to try to achieve this. This is the only “free” work around I can find. I hope it helps you.

This process outlines how to create a Personal SharePoint Blog and also how to then copy SharePoint Blog entries into the SharePoint Wiki. This solves the time consuming problem of having to upload images to the SharePoint Wiki manually if you would like to do a Wiki post. Not only that, but it also gives you your own personal SharePoint Blog page that can be used to post your own articles to the rest of your Team.


Creating your personal SharePoint Blog page


Navigate to your personal SharePoint page. You can do this by logging into our normal SharePoint Team page, then click on your username in the top right of the screen and select My Site.

Click on the My Content tab.

Then click on Create Blog.

Open up word and select New, then select Blog post.

Select Register Now.

Select SharePoint Blog.

Copy and paste your blog URL into the Blog URL field.

Click Yes and check the Don’t show this message again checkbox.

It will then contact the SharePoint Blog.

Click OK to acknowledge the successful account registration.

Create your blog post. Then click Publish.

Refresh your blog and you should see your post. From here you can create Categories for you posts or manage your posts etc.

Creating the SharePoint Wiki entry from the Blog post

To make a SharePoint Wiki Entry off the blog post do the following.

Create the page for your Wiki Entry.

Once the page is created, you can paste the body of your Blog article on the wiki page.

Go back to your blog post you created earlier and then click the Edit button.

With your mouse, select and copy the entire contents of the body so that it is all highlighted.

Paste this into your new Wiki page. Copy the title over as well. Check for formatting and then click Save & Close.